
Friday, October 30, 2009
OK my goodness. I have been so busy. Sorry for the lack of posts. We've been sick, busy and some of my friends have been around last couple weeks so no time for anything. We do have paint in. It looks amazing!!! Called about interior today. Waiting for them to call me back with a price. :D Ummm..... Can't remember if I said we got new front fenders. Waiting on getting a hood which costs $500. Dad put in the trunk drop off I think is what it was called I'll get pictures later to explain. Body work on the quarters look wonderful. Near perfection!!! Anyway I guess that's all to report. Till next time......
Tuesday, September 29, 2009
Hey well I haven't taken pictures for a while that's why I haven't posted for about a month now I geuss. Plus I've been pioneering this month so it's been CRAZY!!! I will get pictures taken in the next couple of weeks and get them on here. We have bought new front fenders. Some more Chrome Molding and some other stuff I cant think of right now. But I will get pictures and a list of some of the new stuff on inventory pretty soon. :)
Saturday, August 22, 2009
Scoop or Fins
 Trying to figure out which one I really want to put on the car I want opinions PLEASE!!!!!
Body Work and put together driver side pictures
 This is the new bondo that we bought. It works allot better and Daddy can see it so much better.
 Again this is a better shot of the passenger side rear fender.
 I thought this was an awesome shot.
 It actually looks like a car. LOL
Saturday, August 15, 2009
Rust Bulleting the Floor Boards
 Well now we are using a Purple gun to spray the Rust Bullet. We also tried paint brushes cause it didn't want to spray very well. But didn't get pictures of that sorry.
 This is the finished project. You can kinda tell it has allot of texture to it that shouldn't be there. That's from the brushing and the sparying.
 Close up not sure if everyone can really see the grain to it. So we really don't like Rust Bullet. We have nothing good to say about it. It was a waste of $100 for the gallon we bought. We couldn't get it to spray or brush on right. Atleast we did this where no one well see it. Since all the carpet will cover it.
Friday, August 14, 2009
Beginning of body work
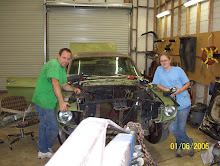
 Turning into a "family" project. That's my uncle Rod. He has restored a Cuda I believe and working on another one I think. But don't take my word on that.
 My Cousin Dave. Dad in the background inspecting the work. :-)
 Mixing up somemore bondo. And By the way we have different bondo now that's blue I'll get pictures of it later.
 Not sure if wet sanding or just wiping it down.
 Does anyone see Bullwinkle???
 Stripping the door down. putting Prep- All on it I believe.
 Same door different shot.
Wednesday, August 12, 2009
PRIMERED.....kinda
 The wonderful Blue Paint Gun we use for Primer.
 Turning a weird color.
 Almost half done.
 Got the Front End done. Dad's working on the inside.
 The somewhat finished primer. We just did underneath and the front end since didn't have to do body work. It will keep that part from surface rusting while doing body work to the rest.


Monday, August 10, 2009
Getting ready to sandblast and sandblasting
 Taking out the bolts that held the seat belts in.
 Tossing it to the side.
 Cody pretending it's a slip n slide
 Before
 During. Ther red was the primer and the silver is the metal.
 Man that's a big difference
 All that was up there was tar and asphalt. We couldn't torch that stuff out but the sand took care of it.
 He's getting up or I should say down around the dash and firewall.
 That is how we were moving it in and out of the garage.
 In it goes. If you look at the date on the first photo and this one it took us 4 days to get it all sandblasted. The day after this last picture was taken it started raining for like three days we were so glad to have it done.
Welding Equipment and Build Sheet
 We have our nice Welding Staion here.
 Then we have a shot where you can see the welding job in the back
 This is the build sheet for the car we found in the Wiring harness. The other two pictures are just so you can see some of the codes on it.

Hey Ya'll
Again so sorry it's taken me a long time to get pictures on here. I've been really busy with work and service. Plus when I tried loading some of pictures to my computer they didnt load right so just haven't had a chance to get all straightened out till now. I'm going to put up the welding equipment and the build sheet and the sandblasting pics today. I'm going to just put a few pictures on everyday instead of a bunch like I did last time so everyone can kinda keep it straight. Again Sorry for taking so long.
Friday, July 24, 2009
A Clarification
Ok long time ago I posted a picture. I had "redneck paint stirrer" written beside it. Well I thought I would clarify that it was Rust Bullet not just paint.
Oh and yesterday we started sandblasting the car. Got pretty much the underneath done and the driver side. Don't worry I have pictures I just need to put them on our computer. I will get them on here this next week promise. I'm going to have a busy weekend so don't expect any right now. But you never know I might suprise you. :D
Oh and yesterday we started sandblasting the car. Got pretty much the underneath done and the driver side. Don't worry I have pictures I just need to put them on our computer. I will get them on here this next week promise. I'm going to have a busy weekend so don't expect any right now. But you never know I might suprise you. :D
Finally The Seat Riser.
I didn't get too many pictures of this sorry.
 The Seat Riser painted with Rust Converter.
 Floor pan the black is Rust Converter the silver is Weld Thru Primer. As you can see in the top right corner the fan which we used to make it all dry faster.
 We're getting it fitted. Which in case you were wondering what that involves it's allot of hammering, bending, hammering, putting weight on it, hammering, clamping down, and hammering again and usually in that order for all sheet metal we replaced. :D
 Thats it all finished up.
If I find more pictures on the camera that i just haven't got on computer yet I will put them on here sometime this week. Thanks for being patient with me. I finally got ya'll some pictures. Hope you enjoyed them.
Thursday, July 23, 2009
Now Putting In The New Floor Pan.
 This is my friend "Sandy" (it's sand blasting sand) she is using her weight to help us get the floor pan fitted in.
 And as you can tell we are smart we have the Maizetos (which are the best tortilla chips ever) and the Rust Converter right next to each other. We work and eat at the same time. Keeps us from going in the house so much. ;)
 Now I'm brushing on the Rust Bullet.
 This is an outline of where the floor pan will lay on the Front Frame Rail.
 We outlined it so we know where to drill the holes for the spot welds ta-da!!!
 Dad's spraying on Weld Thru Primer.
  We had to drill screws down so we could keep the floor pan tight against where we were going to weld.
 We measured THREE times to be sure not to cut it to long or short since we were going to butt weld it.
 Those are the clamps we used to keep it all in place while dad welded.
 You can't see it but right behind his glove is one of those clamps. He just welded a little on each side took the clamp out and connected the dots.
 That's what it looked like when all said and done. :)
Subscribe to:
Posts (Atom)
